Easy Dutch Oven Shredded Chicken for Meal Prep
If you’ve ever meal-prepped chicken and ended up with something dry, bland, or weirdly watery, this recipe is for you. This easy Dutch oven shredded chicken uses a simple brine and a covered bake to create chicken that’s moist, juicy, and flavorful all the way through. It’s gluten free, dairy free, nightshade free, and designed to be a reliable base for meals all week long.
This post contains affiliate links.
I created this recipe because I needed a better version of “plain” chicken. Something I could make once and use all week without dreading it by day two. I love slow cooker chicken when I want bold flavors, but for meal prep, I wanted chicken that stays juicy, shreds easily, and actually tastes good no matter how you use it.
The secret here is the brine. I’ve tested this every which way. Salted only. Cooked in broth. Seasoned heavily. None of it worked as consistently as a short brine followed by a covered bake in a Dutch oven. The brine seasons the chicken from the inside, while the Dutch oven traps moisture so the chicken cooks evenly without drying out. The result is chicken that shreds beautifully, isn’t watery, and doesn’t have that strange “boiled chicken” flavor I truly cannot stand.
This is one of those recipes that makes the rest of the week feel easier. I make it on a Sunday, and suddenly lunches and dinners come together without much effort. Soups, salads, tacos, chicken salad sandwiches. If I only used this chicken for curry chicken salad or a tarragon chicken salad sandwich, I’d still make it every week.
Like everything on this site, this recipe is gluten free, dairy free, and nightshade free, and it’s been tested to work when you’re tired, busy, and just need something reliable in the fridge.
Why This Dutch Oven Chicken Works
- Brining keeps the chicken moist and lightly seasoned from the inside.
- The Dutch oven traps steam so the chicken stays juicy, not dry.
- Only a few minutes of hands-on time for a full week of meals.
- Neutral flavor that works in everything without tasting boring.
Ingredient Notes
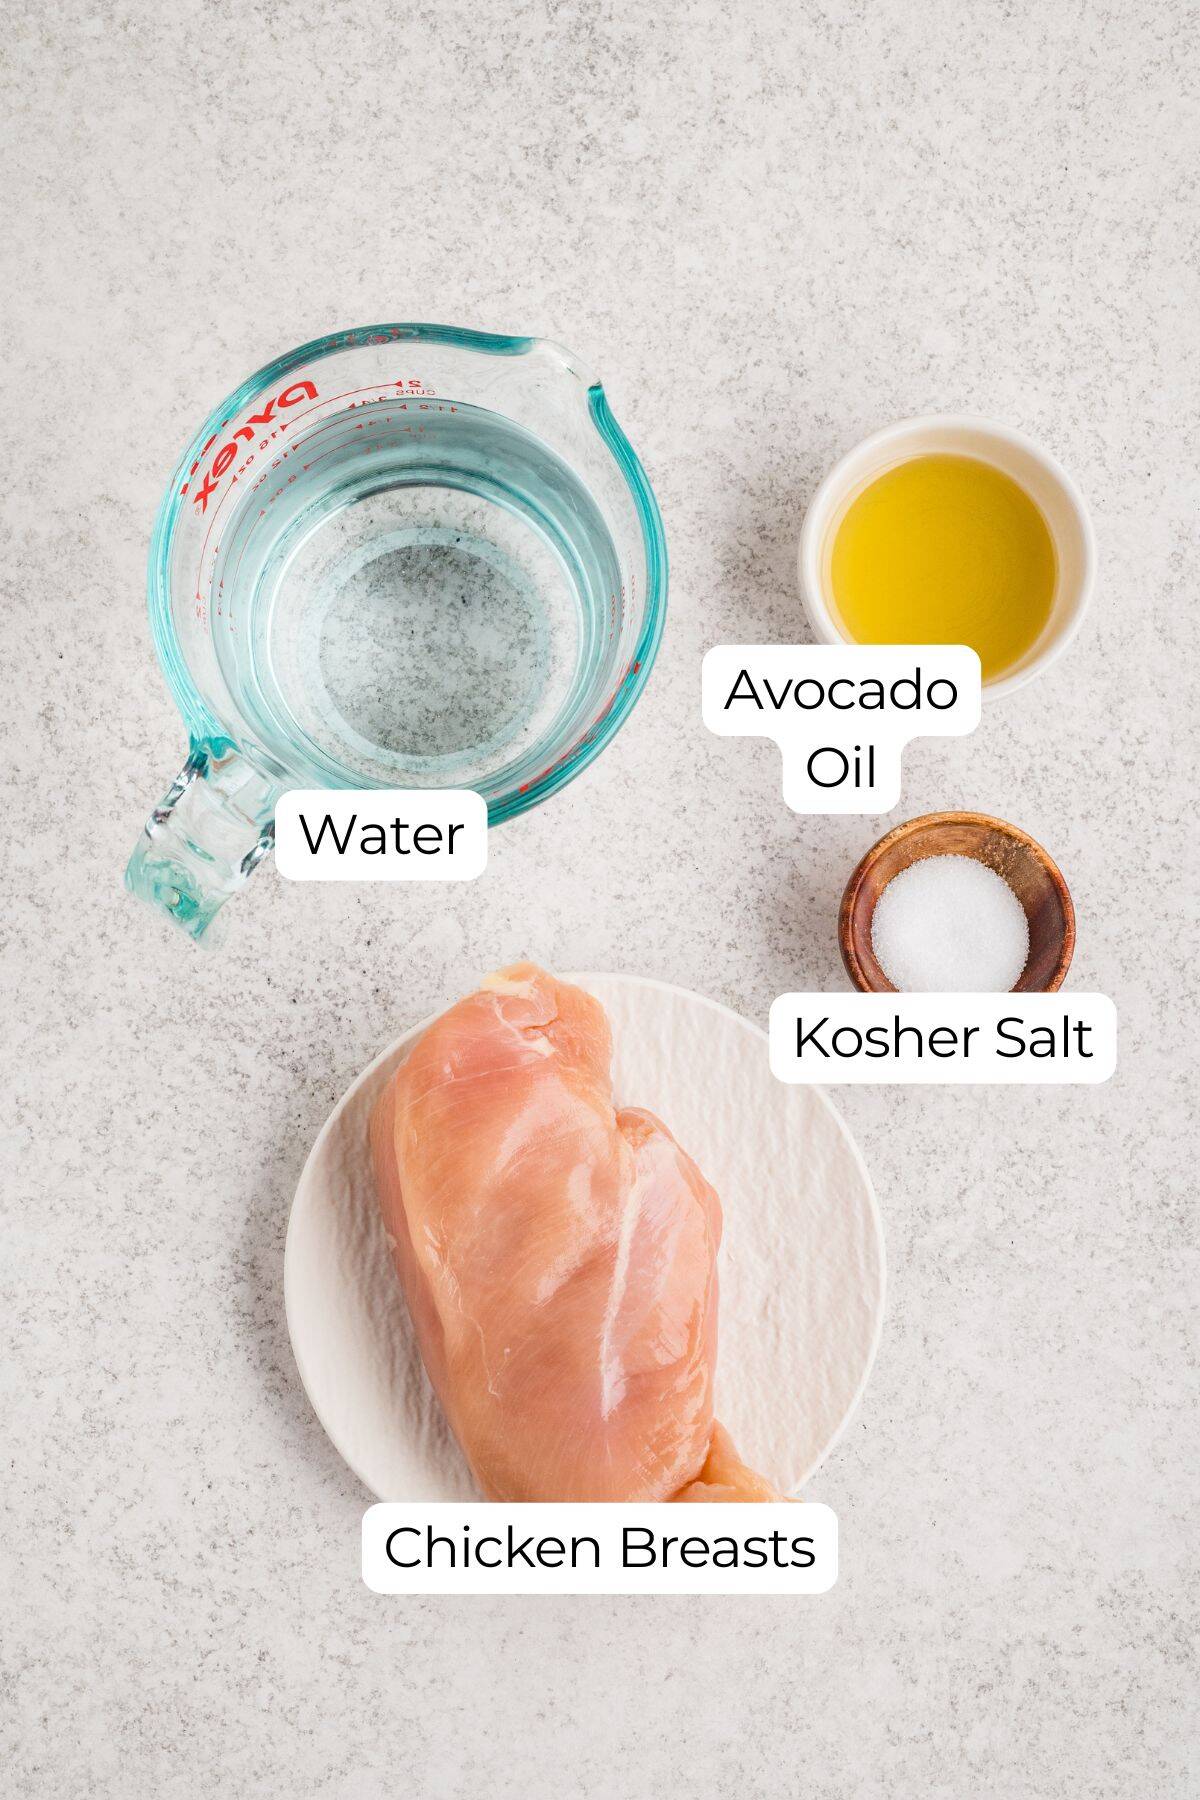
Kosher salt – The type of salt matters here. This recipe was tested using Diamond Crystal kosher salt, which has lighter flakes. Other salts will need different amounts, so check the notes before swapping.
Chicken breasts – Try to choose breasts that are similar in size and thickness so they cook evenly. If needed, lightly pound thicker pieces.
Avocado oil – A neutral oil that handles high heat well. Olive oil works too, but avocado oil keeps the flavor clean.
Full ingredient list can be found in the recipe card below.
How To Make Meal Prep Chicken
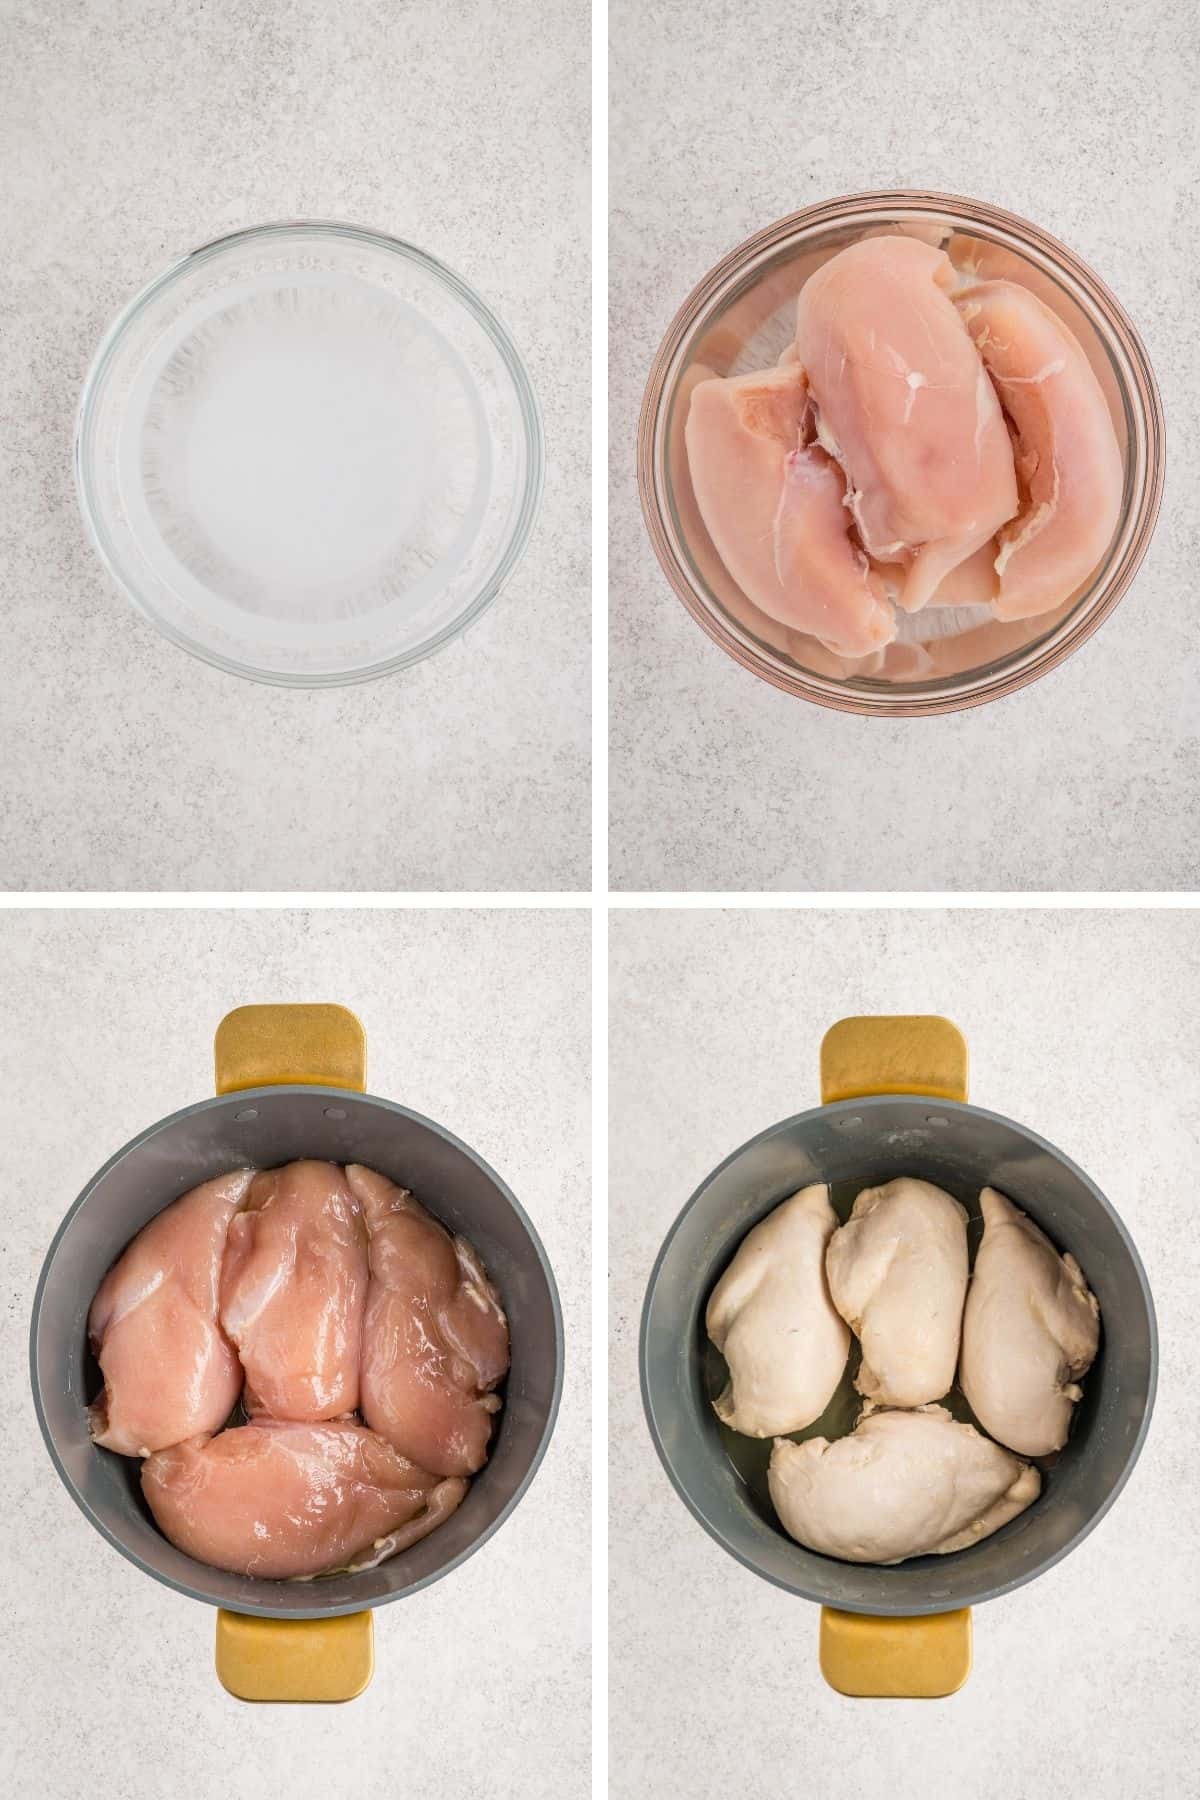
- In a large bowl or a zipper top bag add the cold water and salt to make the brine. Stir until the salt dissolves.
- Add the chicken and make sure it’s covered by the water. Let it sit out at room temperature for 30 minutes. You can brine the chicken for up to 2 hours but if you brine for more than 30 minutes, make sure you put it in the fridge. Remove from the fridge 20-30 minutes before you’re wanting to bake the chicken.
- During this time preheat your oven to 425℉.
- Once you’re done brining, remove the chicken from the brine to a clean plate or cutting board and pat dry with paper towels. Place the chicken breasts in an oven-proof Dutch oven or braising pan or even on a rimmed baking sheet. Sprinkle both sides of all the chicken with the kosher salt then brush the avocado oil over both sides of the chicken as well.
- Cover with a lid (or with foil if on a baking sheet) for about 20-30 minutes or until the internal temperature reaches 165℉. Do not over-bake. Baking time will depend on how thick your chicken breasts are.
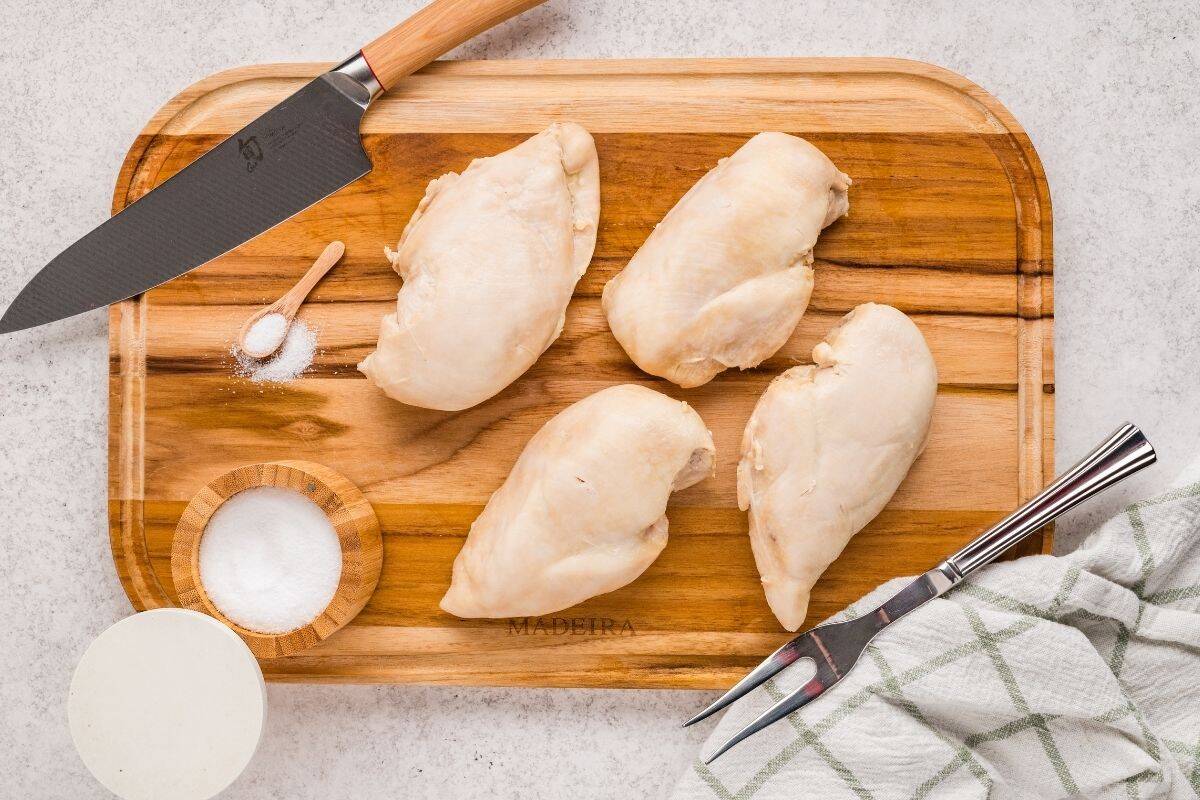
- Remove from the oven and let rest for 10-15 minutes before slicing or shredding.
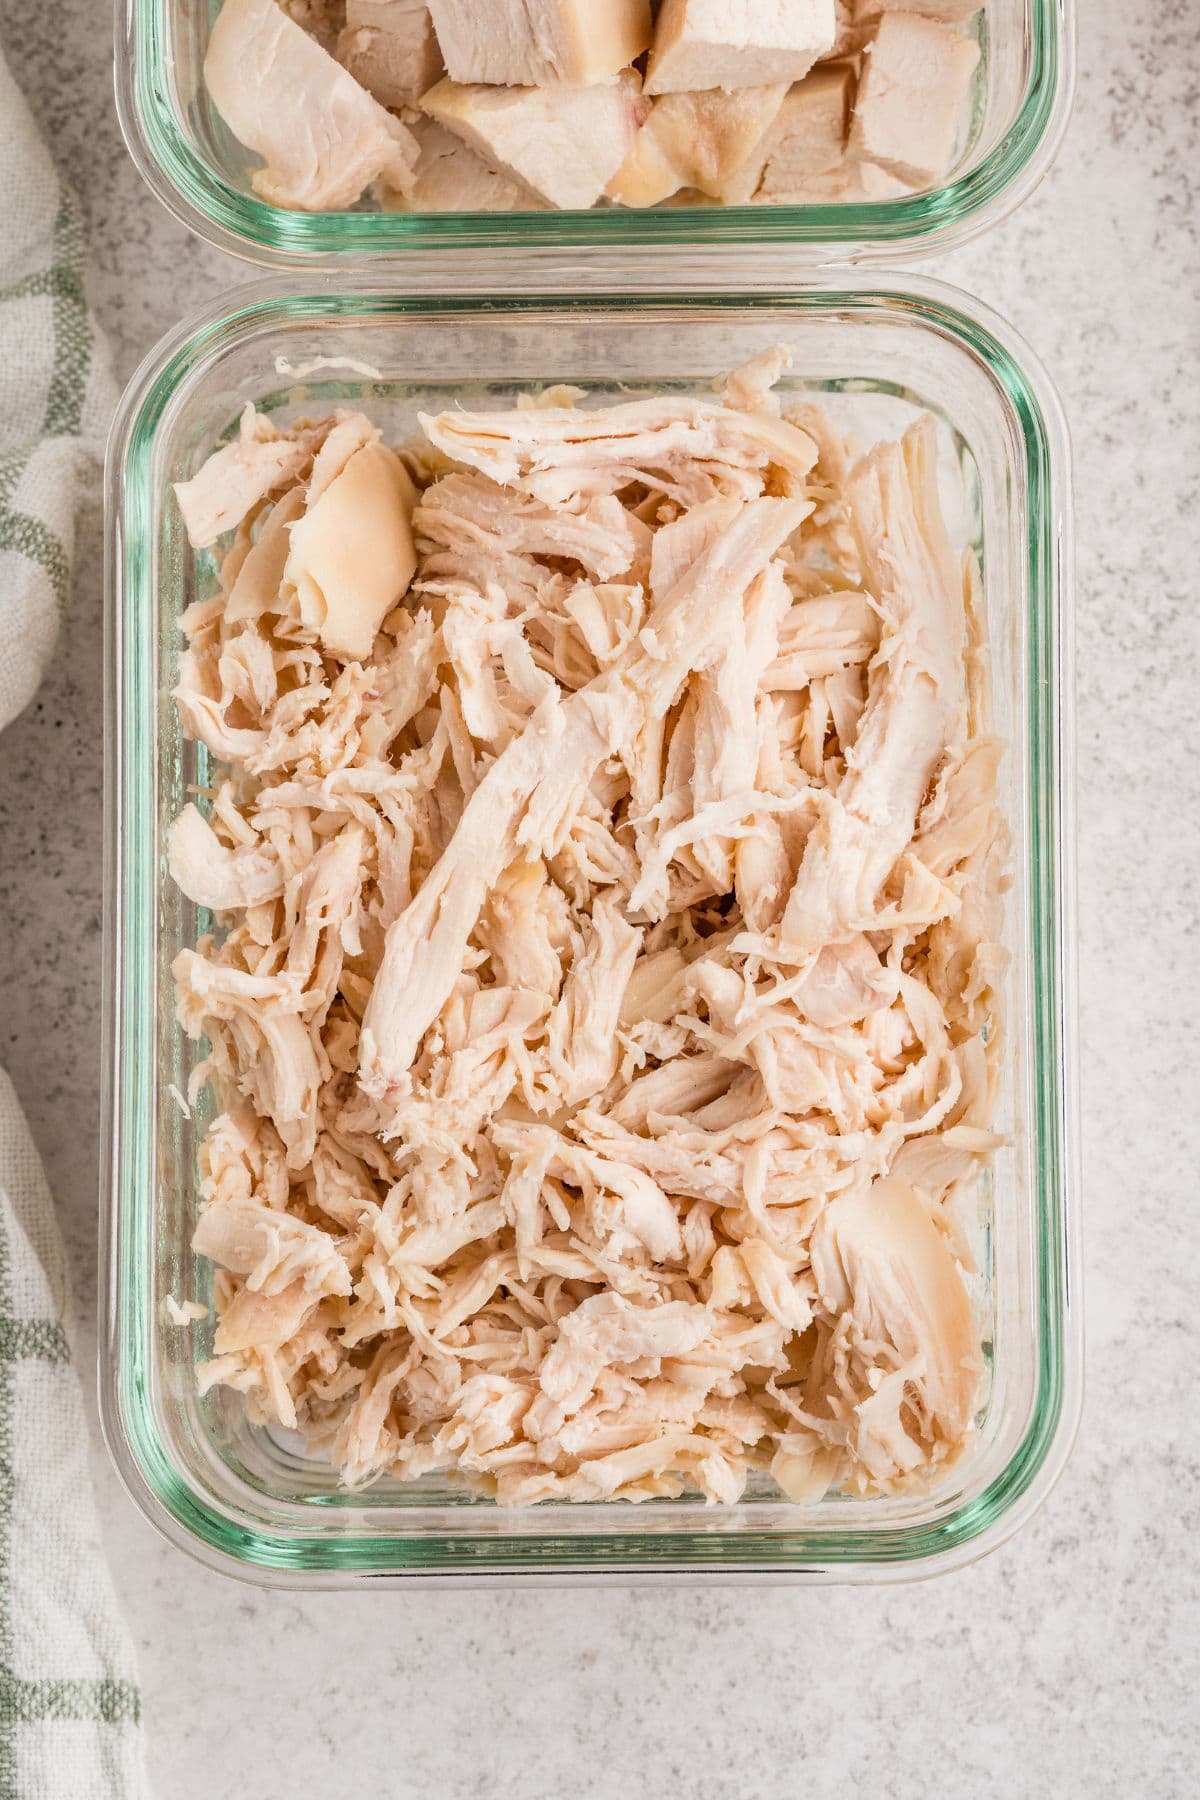
Shredding and Prepping the Chicken for the Week
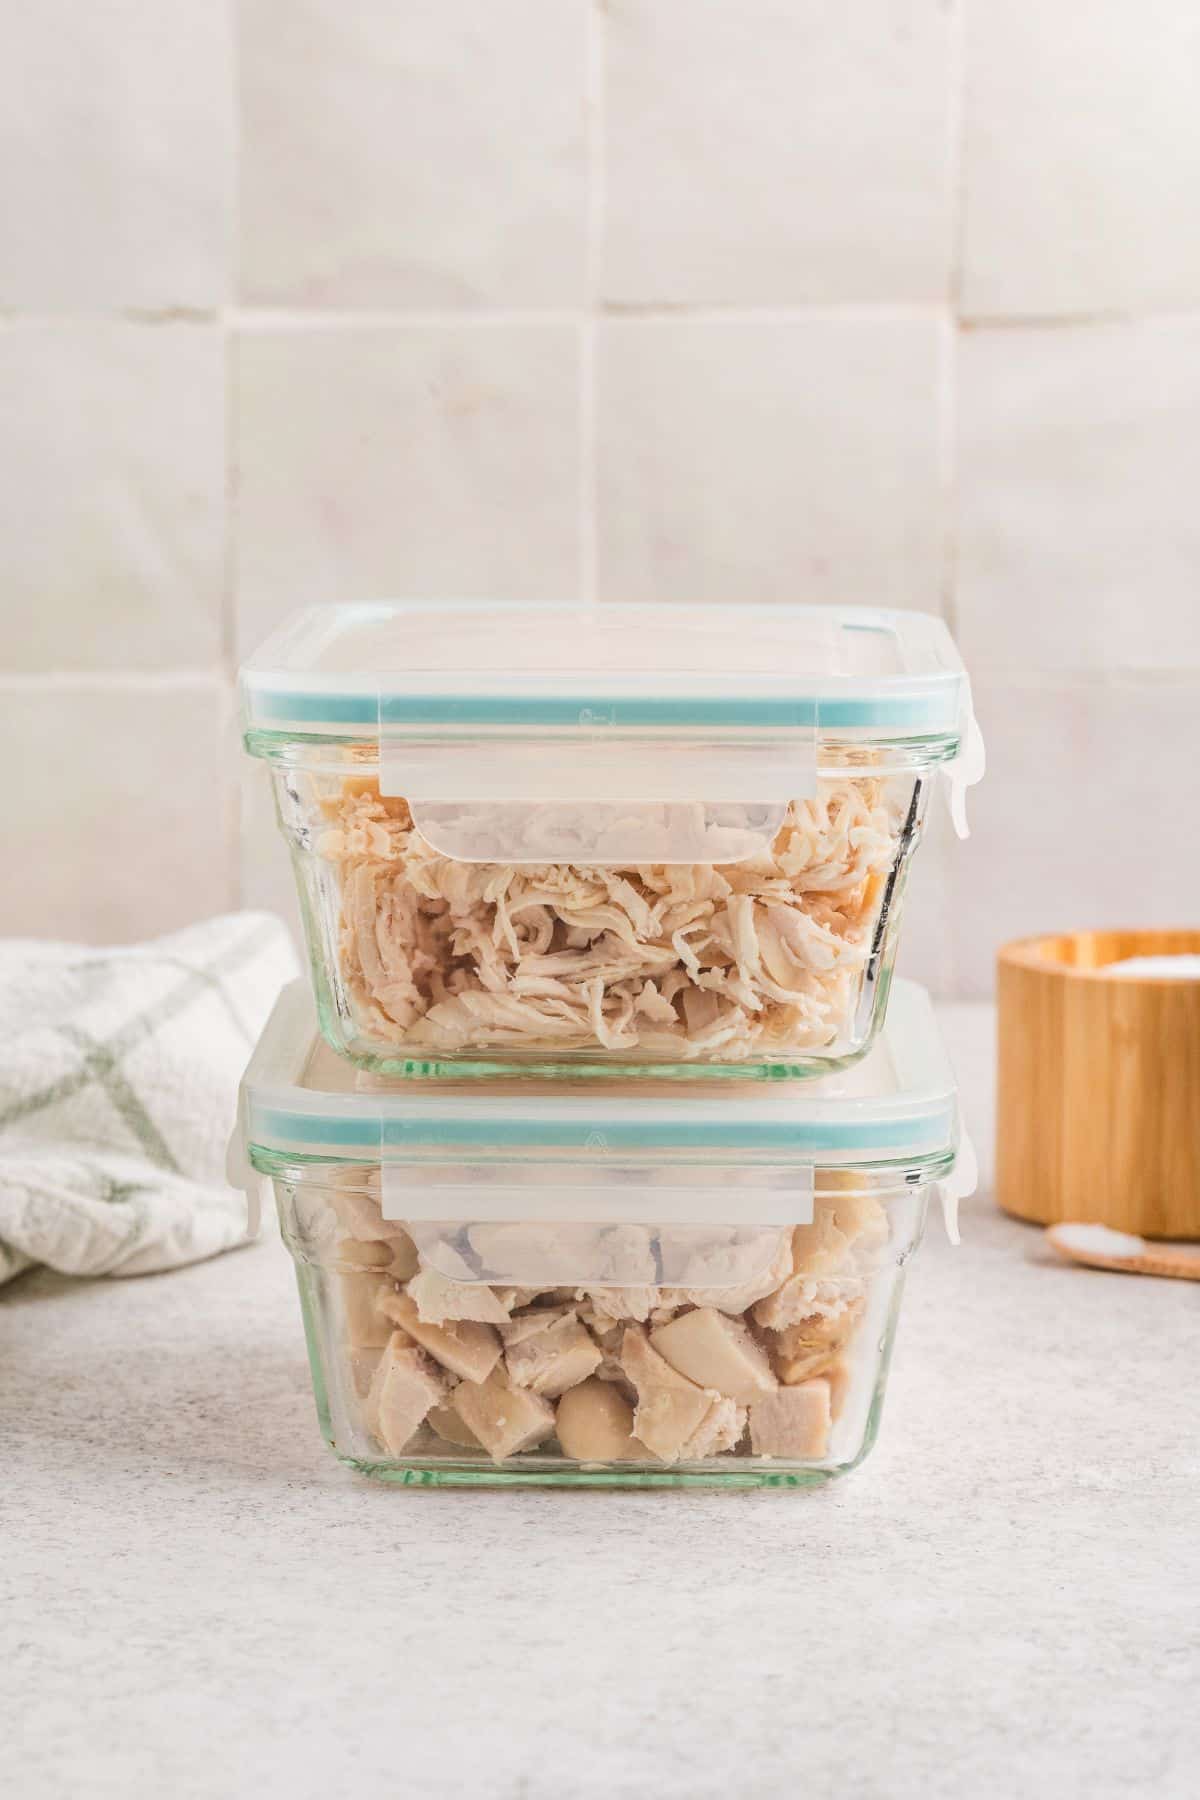
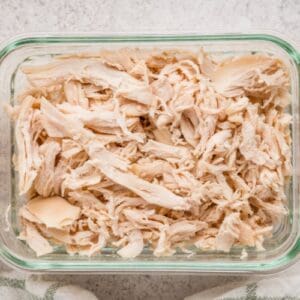
Once the chicken has rested, I recommend either chopping or shredding it before storing. Doing this upfront makes weeknight meals and quick lunches so much easier. When the chicken is already prepped, it’s one less decision you have to make later in the week.
For chopped chicken:
Place the cooled chicken breasts on a cutting board and slice or dice into bite-sized pieces. This works well if you plan to use it in salads, grain bowls, soups, or wraps.
For shredded chicken:
Let the chicken cool slightly so it’s warm, not hot. My favorite method is the simplest one. I place the chicken on a cutting board and gently pull it apart with clean fingers. The chicken shreds easily and stays tender without getting stringy.
You can also shred the chicken using two forks on a cutting board, or add the warm chicken to a stand mixer fitted with the whisk attachment and mix on low speed just until shredded. If using a mixer, make sure the chicken isn’t piping hot so it doesn’t over-shred or dry out.
Once shredded or chopped, store the chicken in an airtight container in the fridge or freezer so it’s ready to go whenever you need a fast, reliable protein for the week.
Jen’s Recipe Tips
- Do not skip the brine. This is the difference between dry chicken and chicken you actually want to eat.
- Use a thermometer. Pull the chicken around 160°F and let it rest so it reaches 165°F naturally.
- Keep the chicken covered while baking. This is key for moisture.
- Let the chicken rest before shredding so the juices redistribute.
- If you accidentally overcook it, use it in soup. It will still be salvageable.
How To Use This Chicken All Week
This is my ultimate backup-plan protein. Here are some of the ways I use it regularly.
- Tossed into salads for easy lunches. I love it with this spinach arugula salad.
- Added to soups (like this dairy free creamy chicken soup) when dinner needs to happen fast.
- Used for tacos, bowls, or wraps. Lemon quinoa and roasted cauliflower and carrots or roasted purple sweet potatoes are all easy for prepping and are delicious with this chicken.
- Turned into chicken salad sandwiches (curry or tarragon are my favorites).
My kids eat this plain. One with ketchup, one with buffalo sauce, their favorites (not nightshade free, but the base recipe works for everyone, and I always have nightshade-free options ready for myself).
If I realize mid-week that we’re more organized than expected, I freeze it for emergency meals later. It freezes beautifully and makes future dinners much easier.
Recipe FAQs
Brining seasons the chicken from the inside and helps it retain moisture, preventing dry, bland meat.
You can, but the chicken won’t be quite as juicy. The Dutch oven traps steam and creates a more forgiving cooking environment.
It will stay fresh up to 4 or 5 days in an airtight container.
Easy Dutch Oven Shredded Chicken
Equipment
- 1 Oven safe Dutch oven
Ingredients
Quick Brine
- 4 cups fresh water
- 6 tablespoons Diamond Crystal kosher salt (or 3 tablespoons of fine sea salt)
Seasoning
- 4 chicken breasts (about 2lbs)
- 3 tablespoons avocado oil or olive oil
- 2 teaspoons Diamond Crystal kosher salt
Instructions
- In a large bowl or a zipper top bag add the cold water and salt to make the brine. Stir until the salt dissolves.
- Add the chicken and make sure it’s covered by the water. Let it sit out at room temperature for 30 minutes. You can brine the chicken for up to 2 hours but if you brine for more than 30 minutes, make sure you put it in the fridge. Remove from the fridge 20-30 minutes before you’re wanting to bake the chicken.
- During this time preheat your oven to 425℉.
- Once you’re done brining, remove the chicken from the brine to a clean plate or cutting board and pat dry with paper towels. Place the chicken breasts in an oven-proof Dutch oven or braising pan or even on a rimmed baking sheet. Sprinkle both sides of all the chicken with the kosher salt then brush the avocado oil over both sides of the chicken as well.
- Cover with a lid (or with foil if on a baking sheet) for about 20-30 minutes or until the internal temperature reaches 165℉. Do not over-bake. Baking time will depend on how thick your chicken breasts are.
- Remove from the oven and let rest for 10-15 minutes before slicing or shredding.
Notes
- Different kinds of salt require different amounts. If you use table salt or a finer sea salt, use 3 tablespoons.
- Try to select chicken breasts equal in size and thickness. If you have varying sizes, gently pound the thicker ones to be slightly thinner. This allows for even cooking, if desired.
- Use an instant read thermometer to check for doneness. Chicken breasts take less time to bake than you think they will. Over-baking will result in dry chicken.
- Let the chicken rest for 10-15 minutes at least before slicing or shredding to let the juices re-distribute. Cutting too soon will result in drier chicken.
- You can brine this chicken for as little as 30 minutes or as much as 2 hours. I noticed no difference in taste between 30 minutes and 2 hours.
- I recommend taking the chicken out at 160 – 162℉ because it’ll get to 165℉ while resting with the residual heat. I use an instant read thermometer in the thickest part of the chicken breast to alert me when it’s ready.
- You can sprinkle pepper on the chicken too before baking, if desired.
- Store leftover chicken in the fridge for up to 3-4 days.
- Freeze leftover chicken in freezer-safe containers for up to 3 months.
Nutrition

About Jen
I create nightshade-free, dairy-free, and gluten-free recipes that the whole family will love. After years of managing my own food sensitivities, I’ve learned how to make dishes that are flavorful, fun, and easy enough for busy weeknights. Let’s bring joy back to your table, one recipe at a time. More About Me